Have you ever noticed a ‘Sitemap’ link at the bottom of some websites and wondered about its purpose? In WordPress, a sitemap is essentially an organized listing of all the pages and categories on a website. It acts as a guide for search engines, detailing the structure of your site, including the locations and names of various pages.
Sitemaps have evolved from their early days as simple navigation aids to now being pivotal for search engine optimization (SEO). While a sitemap alone won’t dramatically boost your SEO rankings, it’s essential for helping search engines navigate and index your site effectively. It’s crucial to remember that optimizing for search engines goes beyond Google. For example, Bing, with a smaller market share, offers unique opportunities for ranking, and optimizing for its search engine can be quite advantageous.
The Importance of Sitemaps
Sitemaps are particularly important for SEO. They might not directly improve your search rankings, but they play a crucial role in ensuring that search engines can discover and index all pages on your site. This is especially true for newer websites that may not have many backlinks. Major search engines like Google, Bing, and Baidu provide tools for website owners to submit their sitemaps, which helps search engine crawlers to find and index your content more efficiently.
Do Established Websites Need Sitemaps?
Absolutely. Sitemaps are beneficial for all websites, regardless of their age or size. They ensure that search engines are aware of all the content on your site. This is especially useful for highlighting updated or important sections of your website, allowing search engines to prioritize and index your content effectively.
Creating a Sitemap in WordPress
Creating a sitemap depends on your website’s setup. For WordPress users, there are plugins that simplify this process. If your website is built using HTML and CSS, there are tools available to help generate a sitemap.
For HTML/CSS Websites: Using a Site Map Generator
If your site is built with HTML and CSS, a Site Map Generator like xml-sitemaps.com can be invaluable. It’s a free tool, ideal for smaller websites with up to 500 pages. The process is straightforward, requiring no registration, and you can download your XML sitemap file immediately. For larger sites, they offer a Pro service, which includes more advanced features suitable for extensive websites.
For WordPress Users: Plugin Options
WordPress offers several plugins for creating sitemaps:
- XML Sitemaps
- Google XML Sitemap Generator
- Sitemap by BestWebSoft
- Sitemap Generator
However, be mindful of the number of plugins you’re using. A plugin like Yoast SEO is a great alternative as it not only creates sitemaps but also offers a suite of SEO tools.
Setting Up a Sitemap with Yoast SEO
To create a sitemap using Yoast SEO:
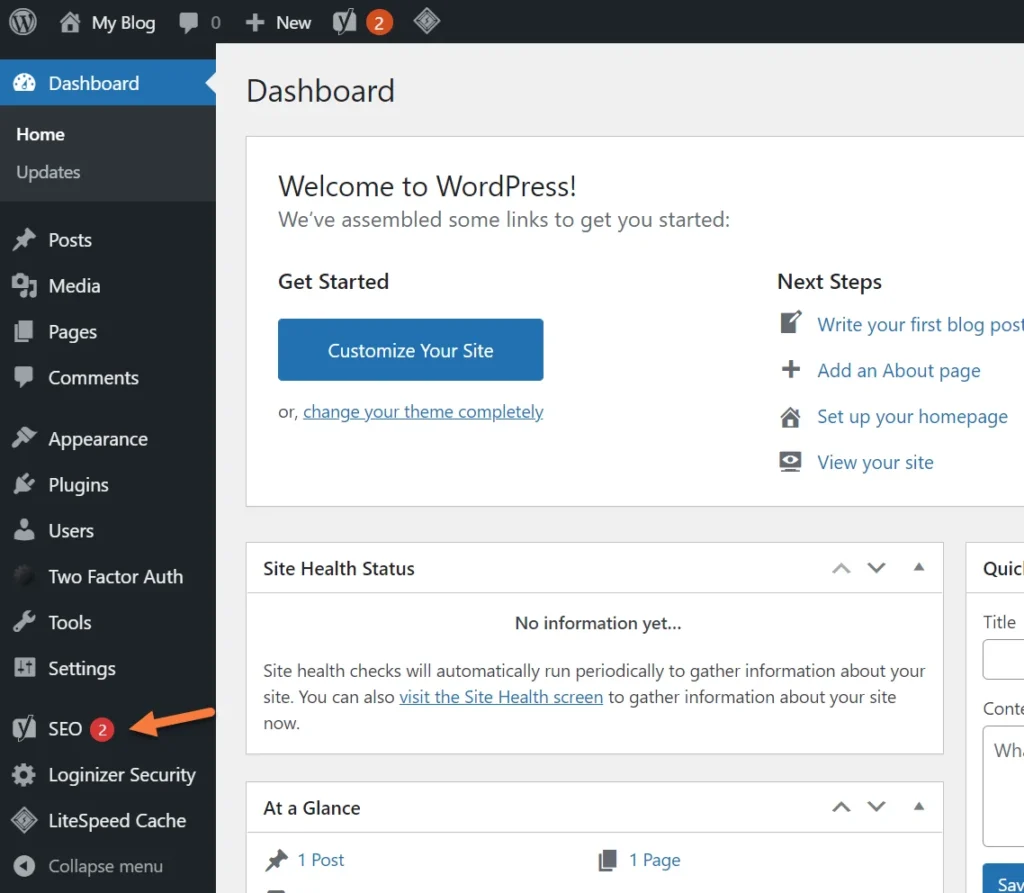
Step 1: Log in to your /wp-admin and click SEO from the toolbar on the left.
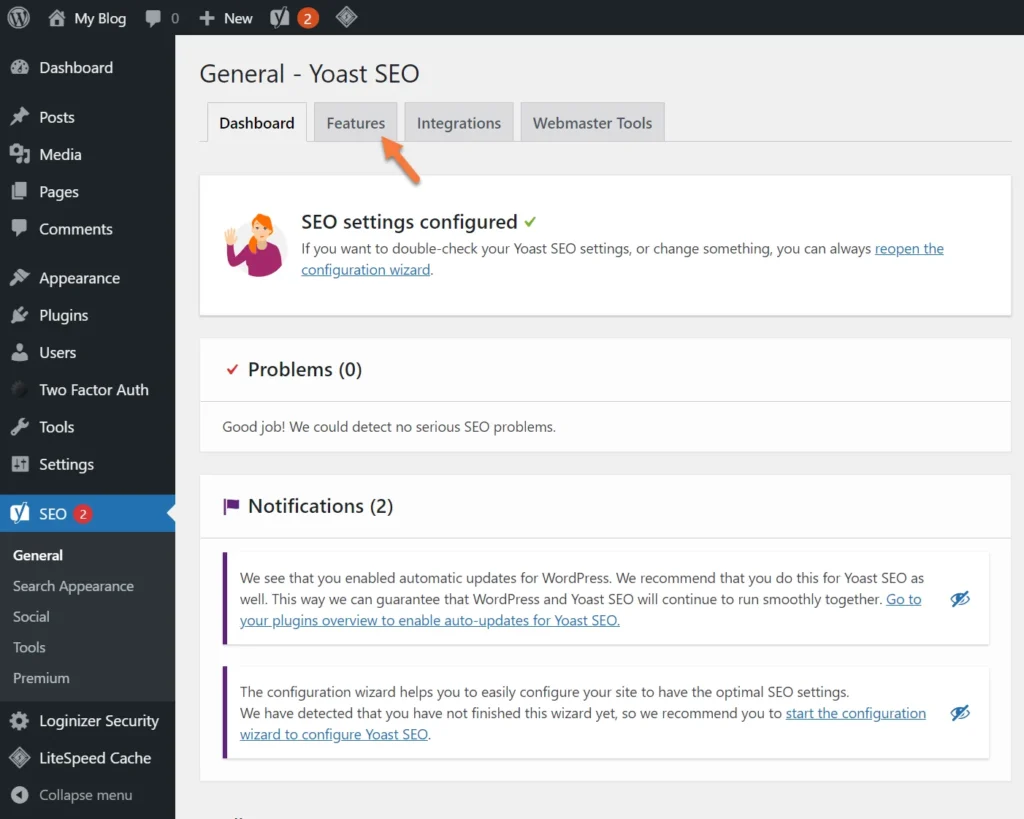
Step 2: From the Yoast SEO Dashboard, click the Features tab.
Step 3: Look in the list of features and ensure XML Sitemaps is set to on.
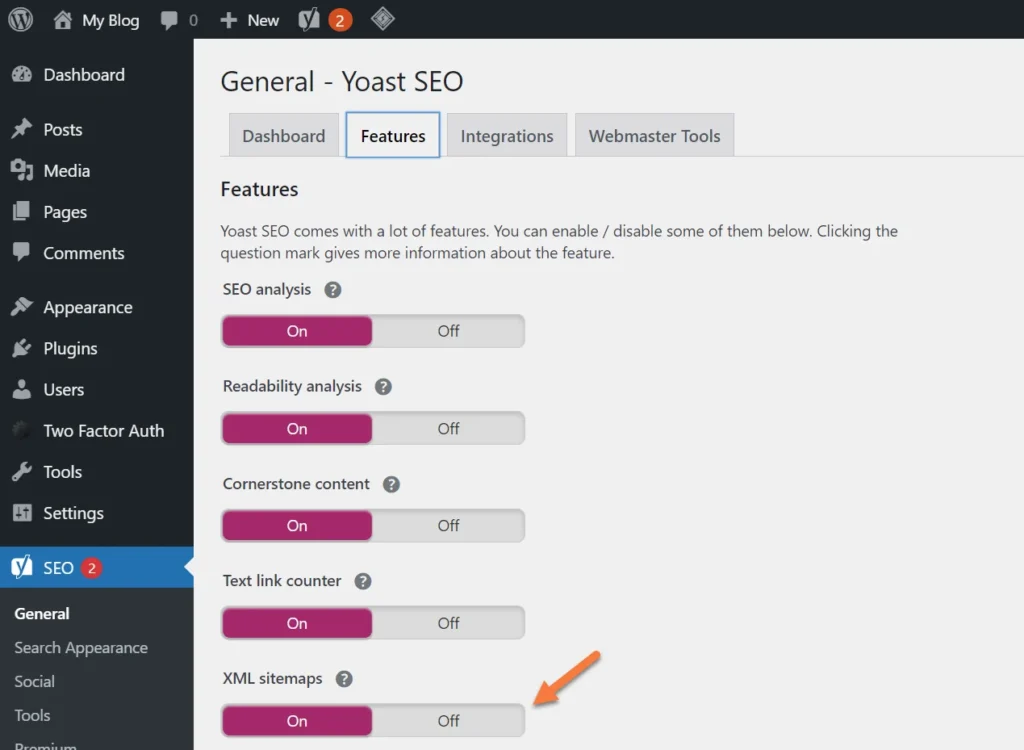
Remember that XML sitemaps are automatically enabled in Yoast SEO. Once you’ve set up the plugin, there’s no need for further manual activation of sitemaps.
Is Just Having a Sitemap Enough for Google, Yahoo, Bing, and Other Search Engines?
It’s good to know that XML sitemaps are automatically activated with Yoast SEO. After the initial setup, there’s no need for manual intervention to keep your sitemaps running.
Getting Your Site Noticed by Major Search Engines
So, you might wonder, is having a sitemap all it takes to get noticed by search engines like Google, Yahoo, and Bing? The answer is both yes and no. While it’s possible that search engines might eventually stumble upon your
new website, this process can often be slow, especially if your site lacks backlinks. This lack of external links can make it hard for search engines to find and index your site.
But don’t worry, there’s an easy fix! You can actively submit your website to these search engines. This step places your site in the queue for their crawlers to index. It’s a simple yet effective way to get your site on their radar.
How to Proactively Submit Your Sitemap to Google
After you’ve prepared your sitemap, the next important step is to submit it to key search engines, starting with Google. This ensures that Google is aware of your site’s existence and knows where to find your sitemap. Submitting your sitemap also provides valuable information, like the number of your site’s pages Google has indexed and any errors it encountered during crawling.
To submit your sitemap to Google:
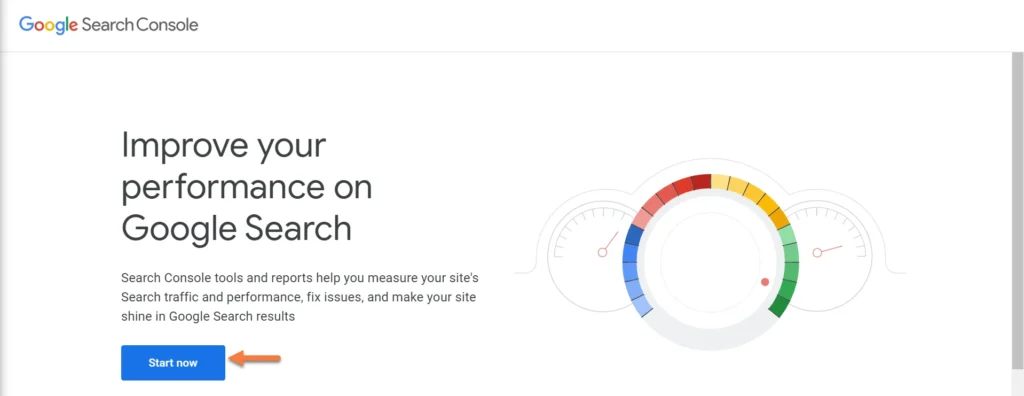
Step 1: Begin by adding your site to the Google Search Console. Access the Search Console here, then select ‘Start now’.
Step 2: In Google Search Console, you have two choices for adding your site. You can add your entire Domain, which covers all subdomains but requires DNS verification. Alternatively, you can add your site using the URL Prefix method. This method only includes URLs you input into the Search Console and supports various verification methods. For this tutorial, we’ll use the URL Prefix method.
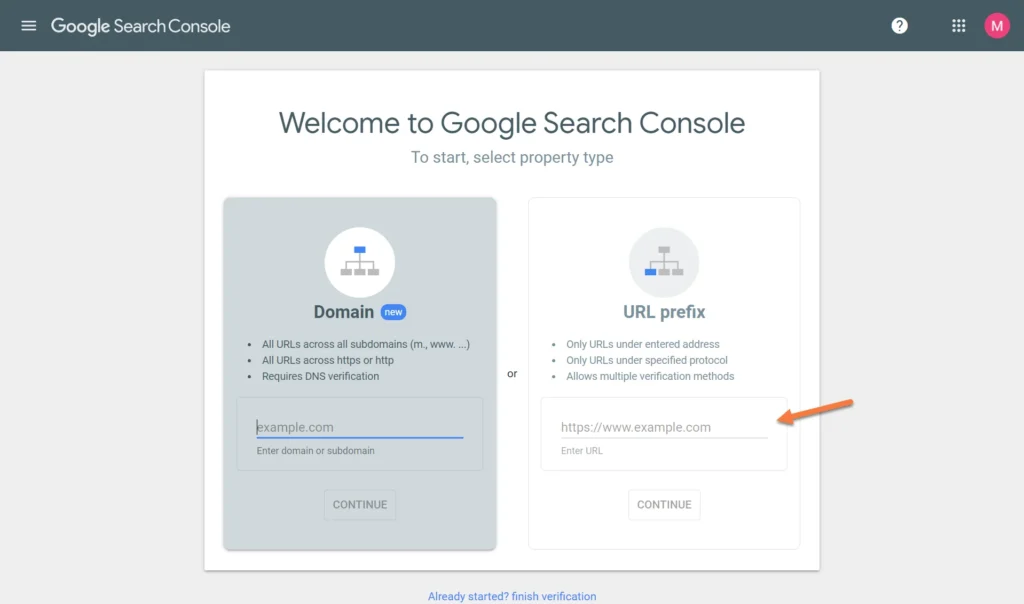
Step 3: Once you select the URL Prefix method, you’ll encounter several verification options to prove ownership of the domain. For simplicity, we’ll focus on the HTML file method in this tutorial. This method is straightforward and user-friendly, making it a great choice for those new to Google Search Console.
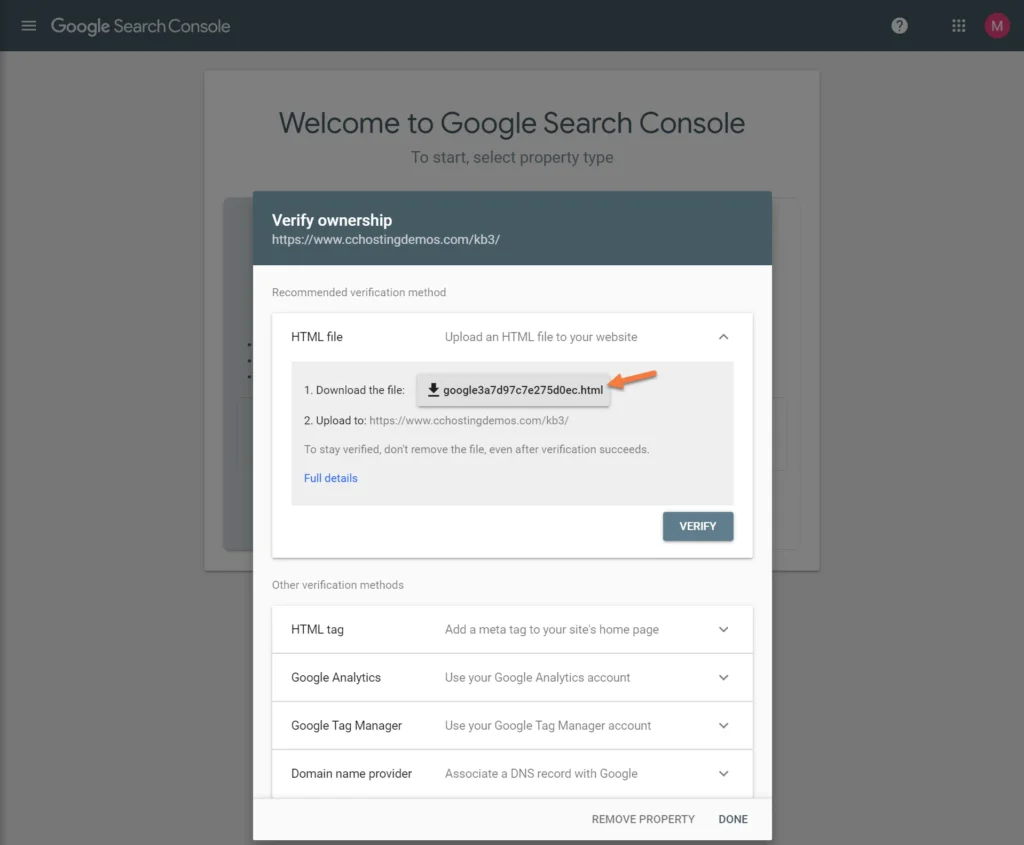
Download the html file and save it to your computer. Next, open your cPanel and open your File Manager.

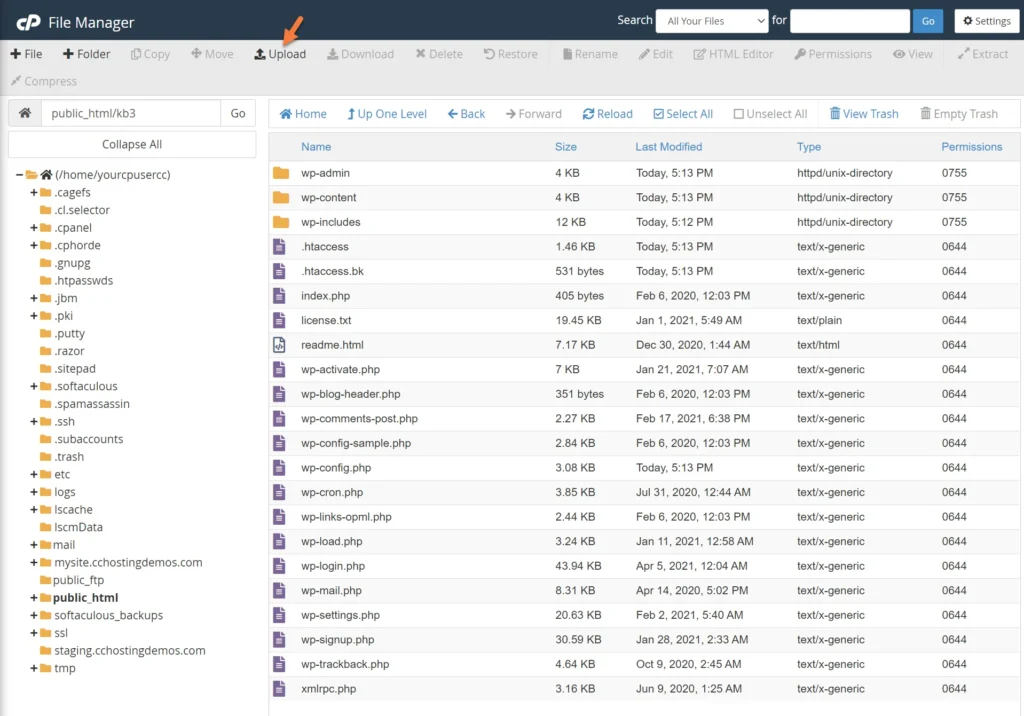
Navigate to the directory where your website is installed. In my case, I’m using WordPress so I’m going to navigate to the directory where WordPress is installed.
Use the Upload function at the top of File Manager to upload the html file that you downloaded from Google Search Console.
Step 4: Once the file is uploaded, return to the Google Search Console and click Verify.
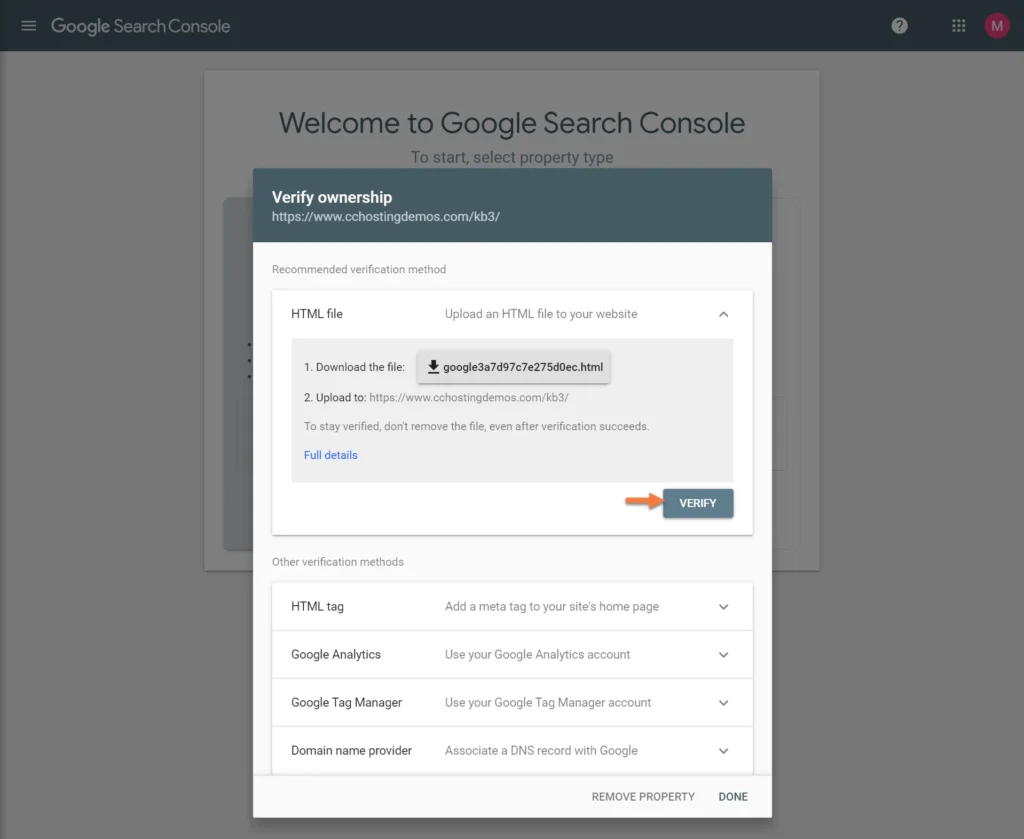
Google will check that it can access the HTML file you uploaded. Once it’s able to do this, you’ll see this message:
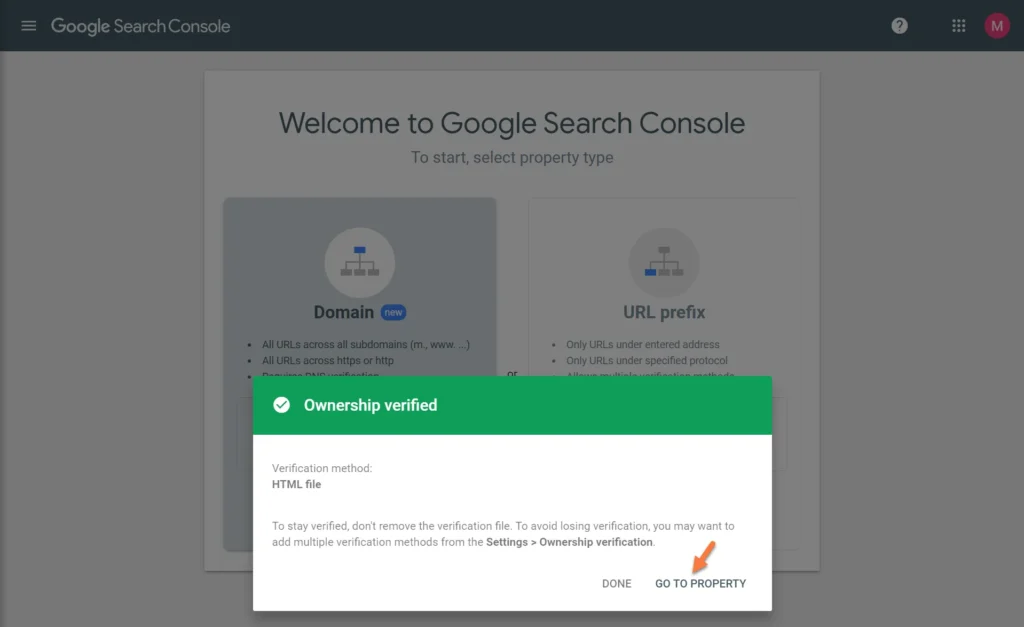
Click Go to property.
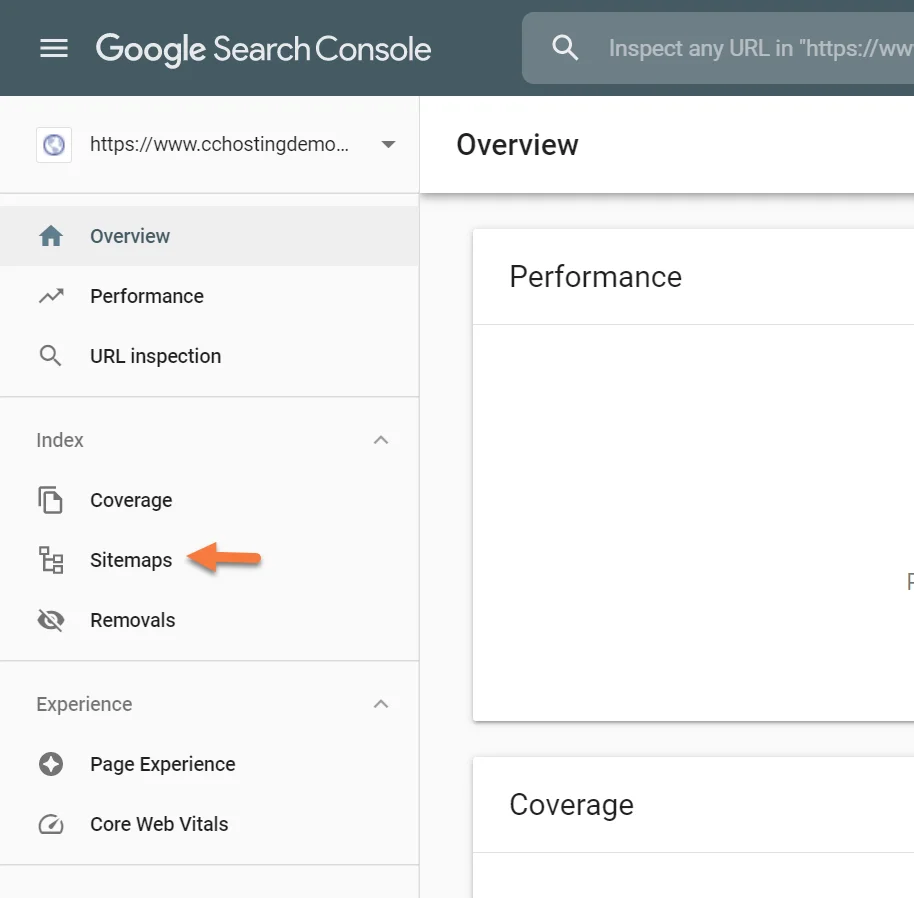
Step 5: Next, click “Sitemaps” from the left menu bar.
Step 6: Next, you just need to enter the URL of your sitemap. If you’re using the Yoast SEO plugin, this is always going to be yourdomain.tld/sitemap_index.xml.
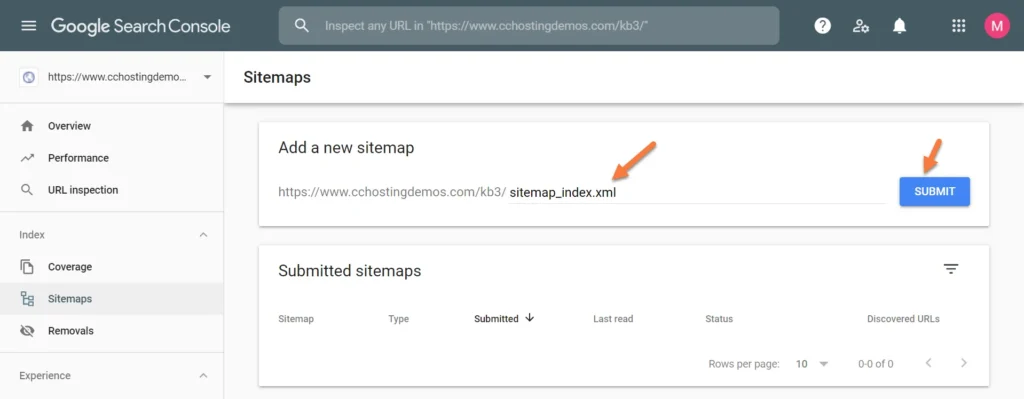
Finally, click Submit.
This will submit the link to your XML sitemap to Google and they will queue your site for indexing by their crawler bots!
Once Google indexes your sitemap, you’ll be able to use the Google Search Console to view statistics such as errors, like 403 and 404, which might be occurring on your site.
Submitting Your Sitemap to Bing
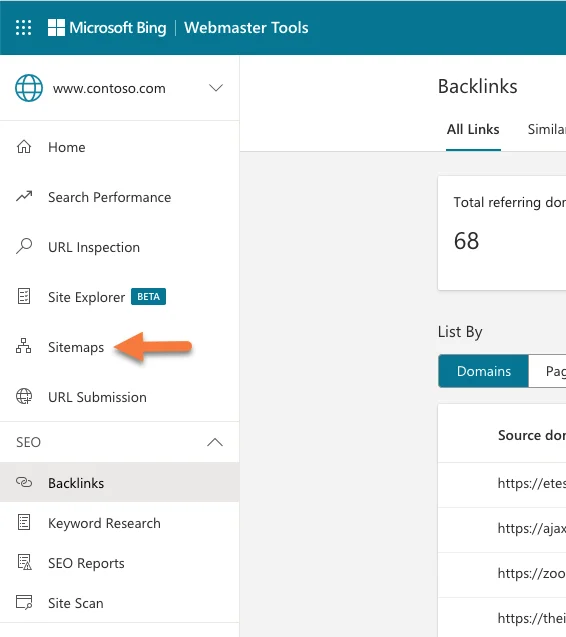
Like Google, Bing also provides its own set of free Webmaster Tools. The process to submit your sitemap to Bing is quite similar to Google’s. Start by signing up for Bing’s free webmaster tools. Once registered, you can submit your site directly through their platform.
Conclusion
A WordPress sitemap is a small yet essential element for any website, regardless of its size. While it won’t instantly propel your site to the top of search engine results, having a sitemap is crucial for ensuring your site is crawled more efficiently than without one.
After creating your WordPress sitemap,
you’ll begin to uncover valuable SEO insights about your site. These insights are key to enhancing your online presence and improving your site’s search performance, ultimately attracting more visitors.
Both Google’s and Bing’s tools are free, so it’s wise to take full advantage of them. They provide an easy and effective way to manage your site’s visibility and track its performance on search engines.
Engage with Us
Do you have any tips or insights about sitemaps? We’d love to hear your experiences and suggestions. Share your thoughts in the comments section below and let’s discuss how to make the most out of sitemaps for website optimization.


